


I can't beleive it is that time again. Fall has been extra beautiful this year and the colours and temperatures have been ideal in Southwestern Ontario. It is pretty easy to forget that the sub-zero temperatures that can destroy your RV plumbing are right around the corner. With this in mind, I decided to winterize our trailer this week while it is sitting in my driveway. I will go through the steps that it took to have this rig ready to face the wrath of winter.
Although the procedure is quite similar for most brands of trailers, they all are different in subtle ways and the locations of drains, by-passes and pumps vary even within brands and model lines. You should have a manual on hand if you have never tackled this before.
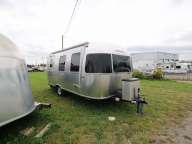
We have a 2005 Airstream and it is really easy to get it winterized. There are two methods of winterizing. One way is to use compressed air to blow all the water out of the lines and then just adding anti-freeze to the drains and the other method is to pump anti-freeze through the entire system. Call me overly cautious but I do both.
What l need to do the job:
Tools: Flashlight, adjustable wrench or slip jaw pliers, air compressor, air nozzle fitting for city water connection.
Materials: old towels for spills, two 4L jugs of RV antifreeze (never use automotive antifreeze! )
Step one, drain the entire system. My trailer has a drain cock on the bottom of the fresh water tank. I start by opening that. Airstreams have a tiny little valve and it takes a while for it to completely empty. You can speed it up a bit by running the taps with the water pump and then draining your grey water tank. I usually just let it drain and while that is happening I get all my other stuff ready. The hot water tank needs to be drained and it has a drain plug. This is likely white plastic and if you can get a socket on it that will be helpful. Mine is 15/16 so its a big socket and there can be propane lines and such in the way. I try to be gentle and use slip jaw pliers to take it out. If yours is copper or brass you might be better to use a wrench. The hot water tank will drain quickly and you can put the plug back in when it is empty.
The other drains are called low-point drains and they can be in a number of locations. On my twenty five foot trailer the valve is beside the water heater and accessible through the outside storage compartment door. On my previous Airstream the valves were all accessible from inside lower cupboards. That's where an owners manual comes in handy.
Step two, by-pass the water heater. Most trailers and RVs will have a hot-water by-pass system. This means that water is redirected around the water heater. If you didnt have this in place your water heater is going to want 6-10 gallons of anti-freeze! On our trailer the by-pass is part of the water heater plumbing, and I have the valves labelled summer and winter and I just have to turn them the proper direction to have it ready to winterize.
Step 2B: This is the one I regularly forget, and it usually means I end up pouring a gallon of antifreeze on the driveway! But kudos for me, this week I remembered, and closed the low point drain after the lines were clear. If you don't remember to close the valve, when you add the antifreeze it ends up as a pretty pink river going down the driveway!
Step three, blow the water out of the lines with compressed air. You will need a fitting that screws into your city water inlet. It has a garden hose thread and usually an air fitting that looks like a bicycle tire air stem. The one I use has a fitting that is like the one on air tools. With my set up I can do the job myself by attaching my compressor hose to the fitting. The procedure is to pump compressed air into the water lines while opening all the taps in the trailer one by one until only air comes out. Remember to do the shower and toilet as well. It will sputter and spurt and don't rush it. Sometimes it takes a few minutes to completely clear the lines. If you have the fitting with the bicycle tire stem you will need a helper pumping the air while you tend to the taps. And if you have an outside shower, do not forget to do that one too! It is the number one item to be forgotten and then frozen and cracked in the winter.
Step four could be your last step if you are really confident that you have got all the water out of the system with the air compressor. Now all you have to do is add a couple of cups of anti-freeze to all the drains including the shower drain and you are good to go. But I always felt as the home handyman that only does this once a year that for the price of two gallons of anti-freeze I will have peace of mind, so I go one step further and add anti-freeze to the whole system.
Step five is going to happen at the 12 volt pump location of your trailer. In our trailer that is behind an access door under the clothes closet. You may have an extra valve right on the line going into the pump. It can select the pump sucking water from the freshwater tank or from the additional loose line that you stick into the antifreeze jug. If you don't have the valve you would have to disconnect the line from the pump to the water tank and connect a line to the jug of anti-freeze. Now when you turn on the water pump keep an eye on the jug of anti-freeze. It should quickly be going down as the pump fills all your lines with liquid. If the taps are all closed it will stop when the lines are full. Now you open each tap and it will first expel air and then out comes pink anti-freeze. Remember to do all the taps, selecting hot and cold, and the toilet and shower as well. Again, remember the outside shower if so equipped. I need two gallons to do our 25 foot trailer. If your rig is larger, you will need more product. I would recommend that you buy twice as much as you think you need, it will keep, and you won't be running out in the middle of the job.
Although step five is not essential if you have blown the water out of the system successfully, I like the visual evidence of anti-freeze coming out of every tap, and the toilet, for complete peace of mind. This also fills the P-traps under the sinks and shower with anti-freeze.
Again, this is my procedure for our trailer, and although it seems like a lot of work when you read about it, I can have this done in a half hour or so. Getting your water system ready for winter is only part of the winterization process and I will address other aspects in a later article.
Everything you need to do this job is available at our Parts Department. We also have documentation that will guide you through the steps available.
I hope this helps, but if you would rather have Can-Am RV Centre do your winterization, contact our service department right away, it is October and we are in full swing!